The Win2PDF setup program creates a printer in the "Devices and Printers" folder named Win2Image.
How to Create a PNG file using Win2PDF
To create a image file in JPEG, TIFF, GIF, PNG, or BMP format:
•Open a document from a Windows application (Word, Excel, Edge, etc.)
•Print the document as you normally do but select the Win2Image printer
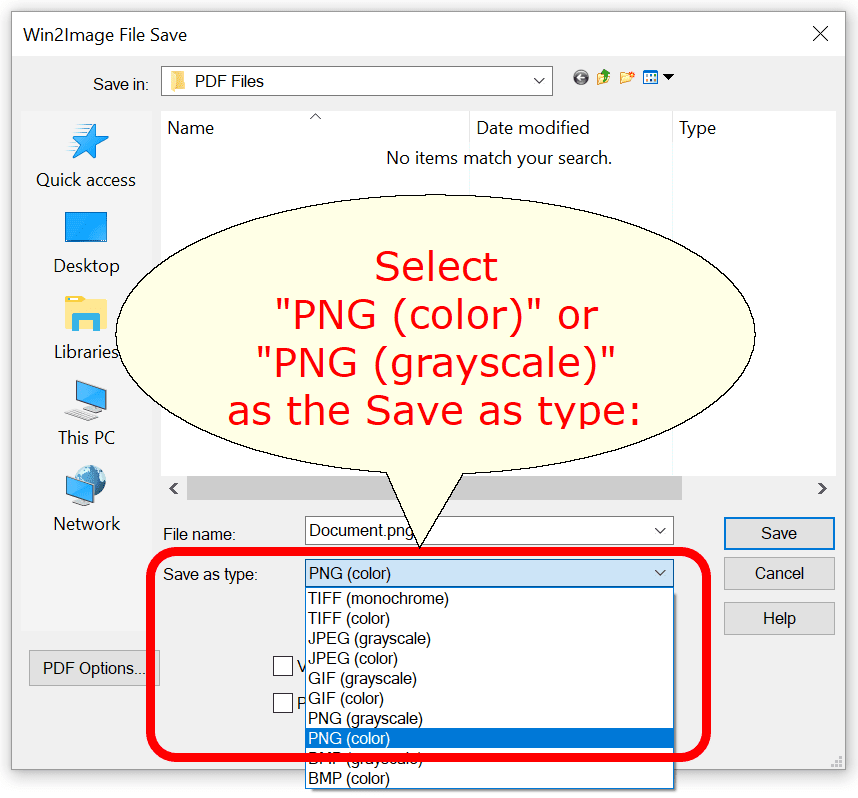
•You will be prompted to enter the name of the document, as shown on this screen:

Win2Image Save As PNG
The default file name is supplied by the sending application. You can choose the format using the "Save as type:" options. Win2Image supports the following formats in color and monochrome/grayscale:
•TIFF (monochrome, grayscale, color, or color with transparent background)
•JPEG
•GIF
•PNG (grayscale, color, grayscale with transparent background, or color with transparent background)
•BMP
If the document contains more than one page, a separate file with a page number appended to the file name will be created for each page for all formats except TIFF.
Print to an image (JPEG, GIF, TIF, BMP, &PNG) using the Win2Image printer
You can choose a number of optional actions to take after the document is created by selecting the check boxes. The options include:
•View File - Opens the file in the default viewer after the file is created.
•Print File - Prints the file to the selected paper printer after the file is created to a Windows printer.
•Send File - Opens a new email message using the default MAPI-compliant email client and attaches the file to the message. The email program is specified in the Internet Options icon in the Windows control panel. Win2PDF can also be configured to send a PNG using Microsoft Outlook (classic), Microsoft Outlook (new), Mozilla Thunderbird, Gmail, Outlook.com, Yahoo! Mail, or custom SMTP servers.
•Delete after Sending - Deletes the document after it has been sent using the "Send File" option.
You can use the file save window to browse to a new location before saving the document. Win2Image remembers this location, and will use the same location the next time you create a document.
If you want to skip the save Window, see the Win2PDF Auto-name feature.
To convert a PDF to a PNG, you can use the Win2PDF Desktop Export PDF to PNG feature, or the pdf2png command line.